*The shop drawings provided by Mbrico are based on the plans or dimensions supplied by the customer. Make sure to verify all measurements on-site before starting the installation. Before you begin, carefully read the written instructions, and watch Mbrico’s instructional video in full. The information below provides the recommended installation steps for the Mbrico Tile Deck system. These guidelines help ensure a successful installation. However, it is up to the buyer and the on-site installer to make sure the installation is done correctly and follows Mbrico’s guidelines.
**Mbrico advises clients to consult a qualified carpentry crew, decking company, or tile setter in their area before placing an order. This ensures that all measurements, order quantities, and the installation are accurate. For larger projects, consider contacting Mbrico for a turn-key installation quote.
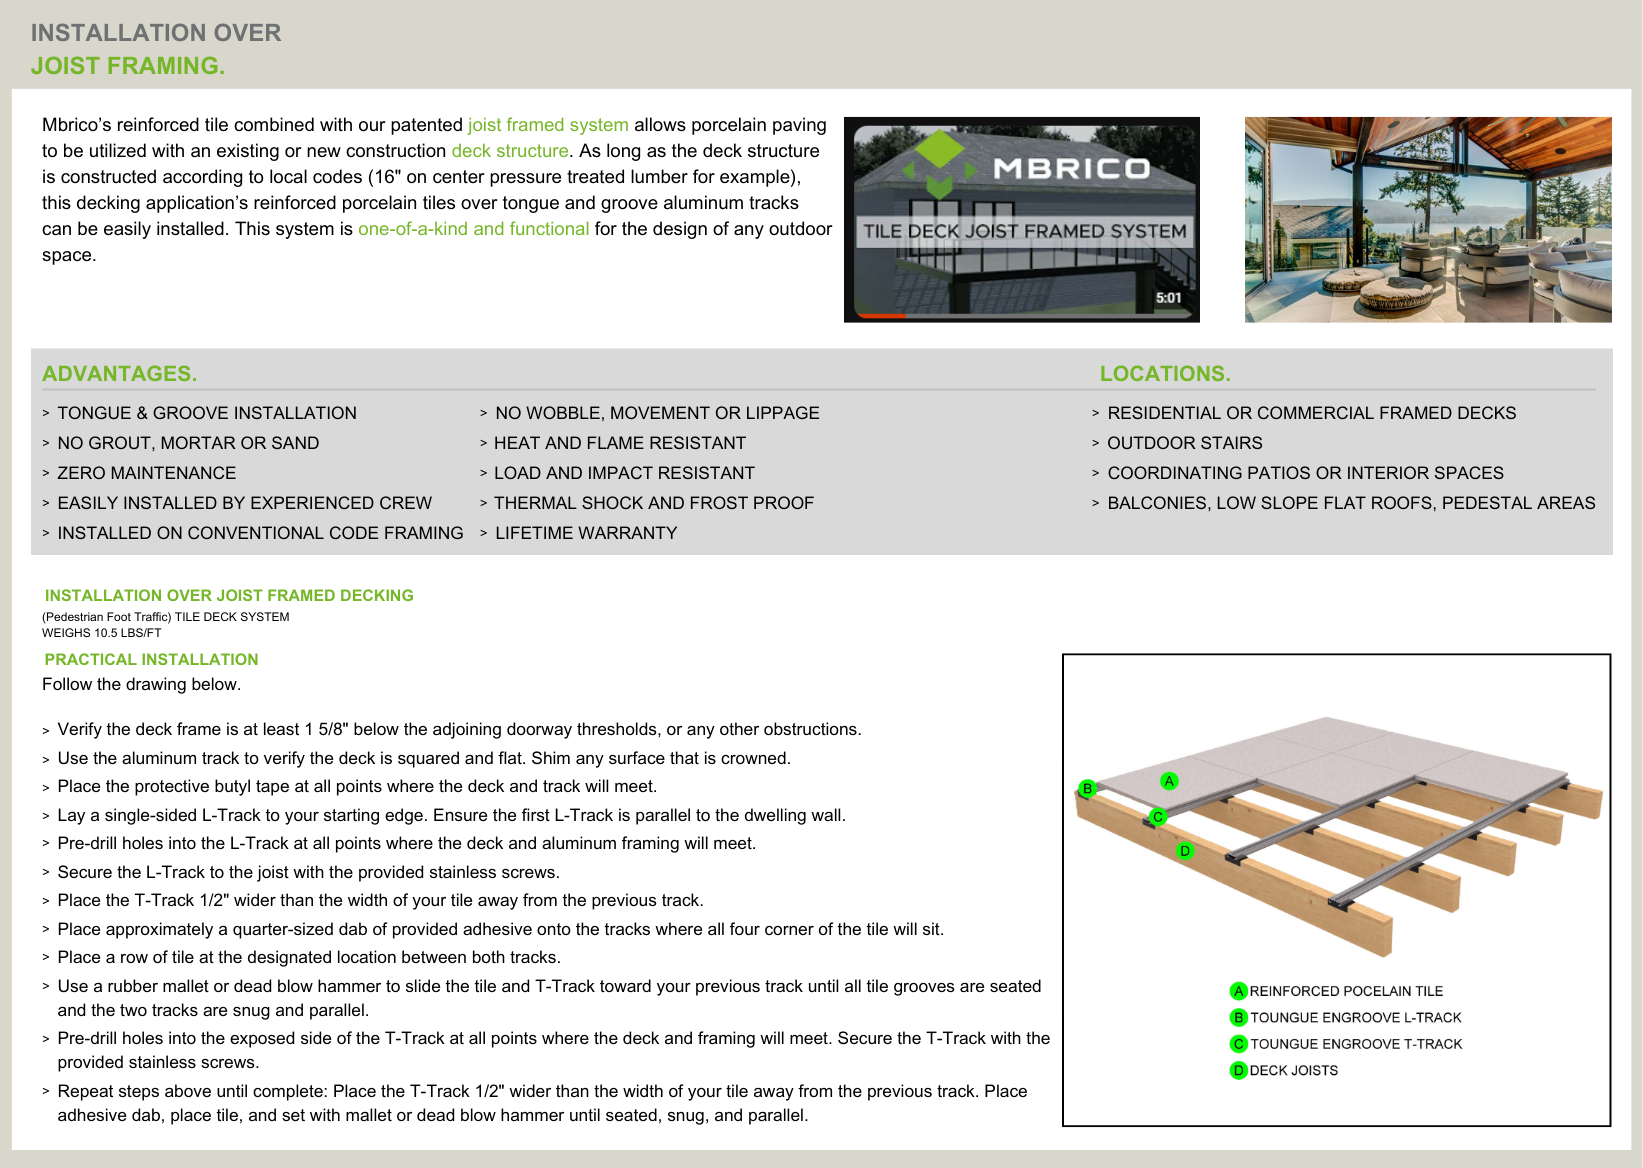
Deck Framing and Structure
Make sure your deck framing and structure have been framed properly and meet or exceed local and national codes. This includes the footings, lumber, grade, quality, and attachment to any structure. All fasteners, hangers, and tie-downs should be professionally installed and compatible with other products, codes, and manufacturers’ specifications. The deck should be properly flashed to conventional surface products to ensure your substructure lasts as long as possible.
Layout and Installation
If possible, follow the layout used when ordering your Mbrico deck surface materials. This will help minimize cuts and place partial tiles in less visible areas of the deck, like with plastic or wood decking materials. In many ways, installing your Mbrico deck is like laying interior tile, requiring planning for stairways, angles, and partial rows. You will also need to plan for handrail installation and the size of the finished edge material. Install your Mbrico deck with care, as it will last longer than other deck products and requires only an occasional spray.
Deck Height and Weight
The Mbrico deck surface adds 1-5/8” to the framing height and a total weight of 10.5 pounds per square foot to your deck.
Easy Installation
Mbrico has taken great care to create a deck system that is easy to install. The installation process is like that of a tongue-and-groove wood floor. This product was designed for a quality carpentry crew to install and offers clients years of maintenance-free enjoyment, saving on refinishing and replacement costs that other deck surfaces require. Mbrico’s deck system is ideal for clients who are not satisfied with conventional plastic or wood options. The textures and finishes offered by Mbrico suit any quality home or project.
Design Goals
The Mbrico Tile Deck system was designed with two main goals:
2. To create a complete deck surface system that is simple in both design and installation, making the installer’s job easier.
- Integrated Tile Spacer: A 1/8” tile spacer is designed into the track, and 1/16” end bumpers are built into each tile, creating a consistent 1/8” margin around all four sides of each tile.
- Grout-Free Construction: No tile setter is required.
- Protective Butyl Tape: This tape is provided to minimize metal corrosion on hangers and the track system, increasing overall deck longevity.
- Field Slotter Router Bits: These bits are available for your router to quickly re-groove field-cut tiles to fit the track for cut rows or angled pieces.
- Simple Stair System: An optional, ready-to-install stair system for deck stringers is available.
- Track Design: The pre-applied tile substrate eliminates the need for thinset, mortar, or grout anywhere within the system, preventing wind uplift and any tile lippage or wobble.